
Last updated: October 2026
Quick answer: Bambi nails, also called deer-print nails, recreate a fawn’s spotted coat with irregular creamy spots over a warm brown, caramel, or nude base. The design is beginner-friendly because real spots are naturally uneven, so there is no such thing as a wrong dot.
Every autumn, a new nail trend steals the spotlight, and this year it might just be the sweetest one yet. Bambi nails, also called deer-print nails, are charming little woodland-inspired manicures covered in soft, irregular spots that mimic the dappled coat of a young fawn. Think of them as the gentle, nature-loving cousin of leopard print: where leopard is bold and dramatic, Bambi print is soft, cosy, and quietly romantic.
The trend fits perfectly with everything we love about fall beauty: warm browns, creamy neutrals, chunky knits, and that cosy woodland feeling of early-morning walks through golden leaves. Whether you are a nail-art beginner or someone who has painted spots a hundred times, this guide will walk you through exactly how to get the look.
Below you will find a clear breakdown of what Bambi print nails actually are, the colours and tools you need, a beginner-friendly step-by-step tutorial, plenty of design ideas for different moods, and practical advice on making your manicure last as long as possible. Grab your favourite caramel polish and settle in — it is time to embrace your inner woodland creature.
What are Bambi print nails?
Bambi print nails recreate the spotted coat of a baby deer using irregular, solid dots in creamy white or pale beige over a warm brown, caramel, or nude base. Unlike leopard print’s dark outlined rosettes, the spots are simple, soft, and scattered like sunlight dappling through autumn leaves.
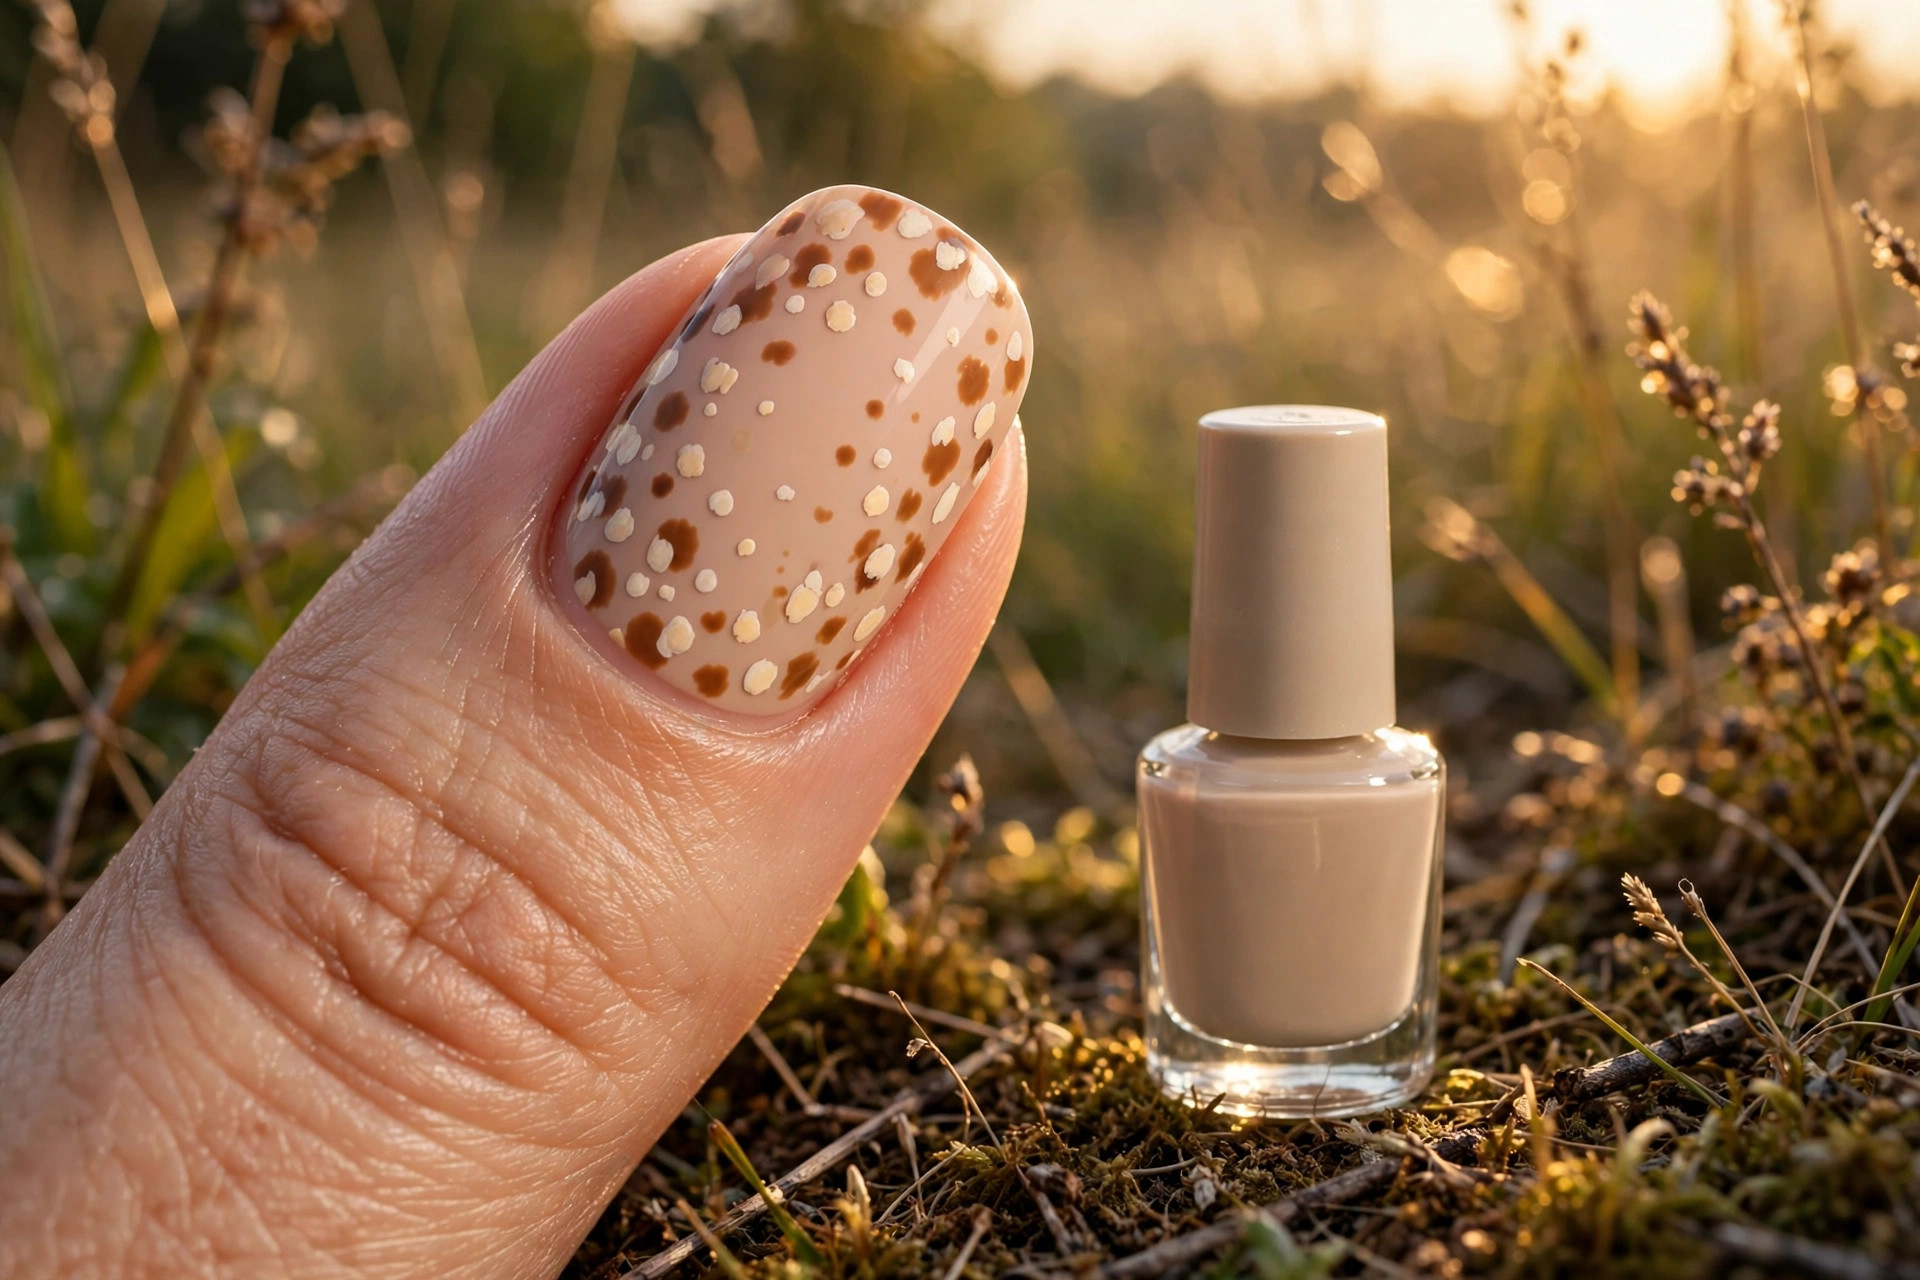
Bambi print nails are a style of nail art that recreates the spotted coat of a baby deer, or fawn. Unlike leopard print, which uses dark outlined rosettes, Bambi spots are simpler and softer: irregular, solid dots in creamy white or pale beige scattered over a warm brown, caramel, or nude base. The overall effect is dreamy and natural, like sunlight dappling through autumn leaves.
The trend sits at the intersection of several bigger beauty movements. Animal print has been a fashion staple for decades, but recent seasons have pushed it in a softer, more whimsical direction. Pinterest’s autumn boards are full of fawn imagery, cottagecore textures, and woodland colour palettes, and Bambi nails fit that mood perfectly. They feel nostalgic and sweet without being childish, which is a hard balance to strike.
One of the best things about this trend is how forgiving it is. Deer spots are naturally irregular in shape and spacing, so there is no such thing as a wrong spot. A wonky dot just looks more like real fur. That makes Bambi print one of the most beginner-friendly nail art designs out there, and a perfect first attempt if you have always wanted to try nail art but felt intimidated. As Britannica notes, young white-tailed deer are born with a spotted coat that helps camouflage them — which is exactly the dappled look this manicure recreates.
Which shades and tools do you need?
You need a base coat, one warm brown or caramel polish, one creamy ivory or soft beige polish, a top coat, a dotting tool or household substitute, and cuticle oil. Start with caramel and creamy ivory if unsure.
Before you start painting, gather your supplies. The beauty of Bambi nails is that you need very little beyond your normal manicure kit, plus a good dotting tool or two.
| What you need | Best choices | Tips |
|---|---|---|
| Base colours | Caramel, toffee, milky coffee, warm nude, chocolate brown, burnt orange | A medium caramel most closely resembles a fawn’s coat; a soft latte nude is subtler for the office |
| Spot colours | Creamy ivory, warm white, soft beige, pale sand | Avoid bright white, which can look too stark; a slightly warm-toned cream looks more natural |
| Tools | Dotting tool set, base coat, top coat, cuticle oil | In a pinch, use the blunt end of a bobby pin, a pencil tip, a toothpick, or a paintbrush end |
- A good base coat to protect your natural nails and help the polish grip.
- Two complementary polishes: one warm brown or caramel for the base, one creamy shade for the spots.
- A dotting tool or substitute: vary the dot sizes for a natural look.
- A glossy or matte top coat: gloss keeps the woodland look fresh, while matte makes it feel modern and velvety.
- Cuticle oil: for finishing and keeping the skin around your nails healthy.
If you are unsure about colours, start with a caramel base and creamy ivory spots. It is the combination that photographs most beautifully and suits the widest range of skin tones. You can always experiment with deeper or moodier shades once you are comfortable with the technique.
How do you paint deer print spots, step by step?
Prep and base-coat your nails, apply two thin coats of your base colour, then dot on irregular cream spots in mixed sizes, varying a few into teardrop shapes. Let the spots dry fully, seal with top coat, and finish with cuticle oil for a polished, professional-looking result.

Set aside about forty-five minutes for your first attempt, and work in good light. Patience matters more than skill here, so put on some music and enjoy the process.
- Step 1: Prep your nails. Shape your nails with a file — almond and oval shapes suit this design beautifully, though squoval works too. Push back your cuticles gently, buff the nail surface lightly, and wipe each nail with remover to take off any oils. Apply one thin layer of base coat and let it dry completely.
- Step 2: Paint your base colour. Apply two thin coats of your chosen brown or caramel polish, letting each coat dry before adding the next. Thin coats dry faster and are far less likely to smudge than one thick coat. If you notice any streakiness, the second coat will usually even it out.
- Step 3: Add the spots. Dip your dotting tool into the cream polish, wipe off any excess, and press it lightly onto the nail to leave a round dot. Real fawn spots are irregular, so vary your dot sizes: mix larger dots with smaller ones, and leave different amounts of space between them. Place a few near the cuticle, a few along the edges, and a cluster near the tip. Step back and look at the whole nail — you want it to look scattered and organic, not lined up in a grid.
- Step 4: Vary and refine. For extra realism, make a few of your dots slightly elongated or teardrop-shaped instead of perfectly round. You can also layer a tiny dot of a slightly darker beige inside one or two of the cream dots for depth. Less is more: it is better to add a few spots and then decide you want more than to overcrowd the nail from the start.
- Step 5: Seal everything. Once the spots are fully dry — give them at least ten minutes — apply a generous layer of top coat. This smooths the surface, protects your artwork, and makes the whole manicure look professionally finished. Reapply top coat every two to three days to extend the life of your manicure.
Finish with a drop of cuticle oil on each nail and massage it in. Take a photo, because your first successful Bambi print is absolutely worth showing off. The American Academy of Dermatology recommends keeping nails clean and dry and moisturising cuticles as part of everyday nail care — good habits that also help any manicure look its best.
What are 9 cute design ideas for autumn?
Once you know the basic technique, try variations from classic caramel fawn to chocolate and cream, accent nails, French-tip twists, matte woodland, golden hour, tiny dense spots on short nails, an ombré fade, or a single statement nail per hand.
Once you have the basic technique down, you can play with endless variations. Here are nine ideas to inspire your next manicure, from subtle to statement.
- Classic caramel fawn: Caramel base with creamy ivory spots on every nail. The original and still the prettiest.
- Chocolate and cream: A deep chocolate brown base with soft cream dots for a richer, evening-ready version.
- Accent nails only: Paint most nails in a solid caramel or rust shade, and add Bambi spots to just your ring fingers. Subtle and office-friendly.
- French tip twist: Nude base, caramel French tips, and tiny cream spots scattered only on the tips. Delicate and unusual.
- Matte woodland: Complete the classic design, then finish with a matte top coat for a soft, velvety effect that feels very autumn.
- Golden hour: Warm bronze base with pale gold spots and a glossy top coat. Stunning in afternoon light.
- Mixed sizes: Keep spots tiny and dense on short nails — it creates a delicate, almost floral effect.
- Ombré fade: Blend your caramel base into a deeper brown at the tip before adding spots, for extra depth.
- One statement nail: Full Bambi print on one nail per hand, solid warm neutrals on the rest. Maximum impact, minimum effort.
Do not be afraid to mix ideas. An accent nail in the golden-hour style alongside solid chocolate nails looks incredibly chic, and a matte top coat can transform any version of the design into something that feels brand new.
How can you make your manicure last?
Cap the free edge with every coat, wear gloves for washing up and cleaning, keep nails at a practical length, and reapply top coat every couple of days. A small chip can often be disguised with a well-placed cream spot, sealed with top coat.
Spotted nail art can chip just like any other manicure, but a few simple habits will keep your Bambi print looking fresh for a week or longer. Always cap the free edge of the nail — that means running your base coat, colour, and top coat along the very tip of the nail, which seals the polish and dramatically reduces chipping.
Wear gloves for washing up and cleaning, since hot water and detergents are the fastest way to wreck a manicure. Keep your nails at a practical length: longer nails look gorgeous with this design, but they also catch on things more easily. If you notice a chip, you can often disguise it with a well-placed spot in your cream polish, then seal it with top coat. Nobody will ever know.
Reapply top coat every couple of days, and keep a bottle of cuticle oil on your desk or bedside table. Healthy, moisturised cuticles make any manicure look better and last longer. If your hands get very dry in autumn weather, a rich hand cream at night will protect both your skin and your polish.
How do you remove Bambi nails and grow them out gracefully?
Soak a cotton pad in nail polish remover, press it onto the nail for about thirty seconds, and wipe away — regular polish needs no harsh soaking or filing. Spotted designs also disguise regrowth well, so you can add a few spots near the cuticle to extend wear.
When you are ready for a change, removal is simple. Soak a cotton pad in nail polish remover, press it onto the nail for about thirty seconds, and wipe away. Because Bambi print uses regular polish rather than gel, there is no need for harsh soaking or filing, which is kinder to your natural nails.
If you would rather grow the design out than remove it, the good news is that spotted designs disguise regrowth better than solid colours. The irregular pattern breaks up the visible line where your natural nail shows through. You can extend the life of the manicure by adding a few extra spots near the cuticle as the gap grows, buying yourself another few days of wear.
After removal, give your nails a little recovery time. A strengthening base coat, regular cuticle oil, and a few days of rest will leave them healthy and ready for your next design. If your nails feel weak or peel easily, consider seeing a professional nail technician for advice on strengthening treatments suited to your nails.
Bambi nails are a reminder that the sweetest trends are often the simplest ones. With two polishes, a dotting tool, and a little patience, you can create a manicure that feels like a walk through autumn woods. Happy painting.
Leave a Reply