
Last updated: November 2026
Quick answer: DIY lash clusters are small lash sections applied underneath your natural lashes to create a full, natural-looking set at home in about fifteen minutes, lasting several days and removable whenever you like.
There is a particular kind of lash look that used to be available only in a salon chair: full, fluttery, perfectly fanned lashes that last for days, with none of the obvious strip-lash band. Lash clusters changed that. These tiny, sectioned lash pieces — applied at home in about fifteen minutes — deliver remarkably close to the salon result.
Please note: this guide is general information only, not medical advice. The eye area is delicate, and lash adhesives can irritate sensitive eyes or trigger allergies in some people. If you have a history of eye allergies, very sensitive eyes, or any eye condition, check with an eye-care professional before trying lash products.
What Exactly Are Lash Clusters?
Lash clusters are tiny groups of lashes joined at the base, with four to eight per eye placed side by side underneath your natural lashes, so there is no visible band and the result looks like naturally full lashes.
- Lash clusters — also called lash segments or cluster lashes — are small groups of false lashes joined at the base, usually spanning just a few millimetres each.
- A full set uses somewhere between four and eight clusters per eye, placed side by side along the lash line.
- Clusters are applied underneath your natural lashes, tucked up against the lash line from below — the secret to their natural look.
- They come in lengths (usually 8mm to 16mm), curls (from natural J-curl to dramatic D-curl), and densities (wispy to full).
- Most beginner kits include a mix of lengths so you can create a graduated, natural-looking map.
How Do Clusters Compare With Strip Lashes and Salon Extensions?
Strip lashes suit a single evening, salon extensions last weeks but cost more and need appointments, while DIY clusters sit in the middle with a natural look, several days of wear and full control over style.
| Option | How it is worn | How long it lasts | Best for |
|---|---|---|---|
| Strip lashes | One band on top of the lash line | One evening | A dramatic one-night look, simplest to apply |
| DIY clusters | Sections underneath natural lashes | Three to seven days | A natural look for a holiday, wedding weekend or busy week |
| Salon extensions | Individual lashes applied one by one | Two to four weeks with fills | Maximum longevity and seamlessness, with appointments |
Salon extensions remain the gold standard for longevity, but a full set takes one to two hours and requires maintenance appointments. For most people, most of the time, clusters offer the best balance of beauty, budget and convenience.
What Should Be in Your Beginner Lash Kit?
A beginner kit needs only mixed-length clusters, a cluster-specific bond, a sealant, precision tweezers, a small mirror and an oil-free remover kept ready before your first application, with no need to buy everything at once.
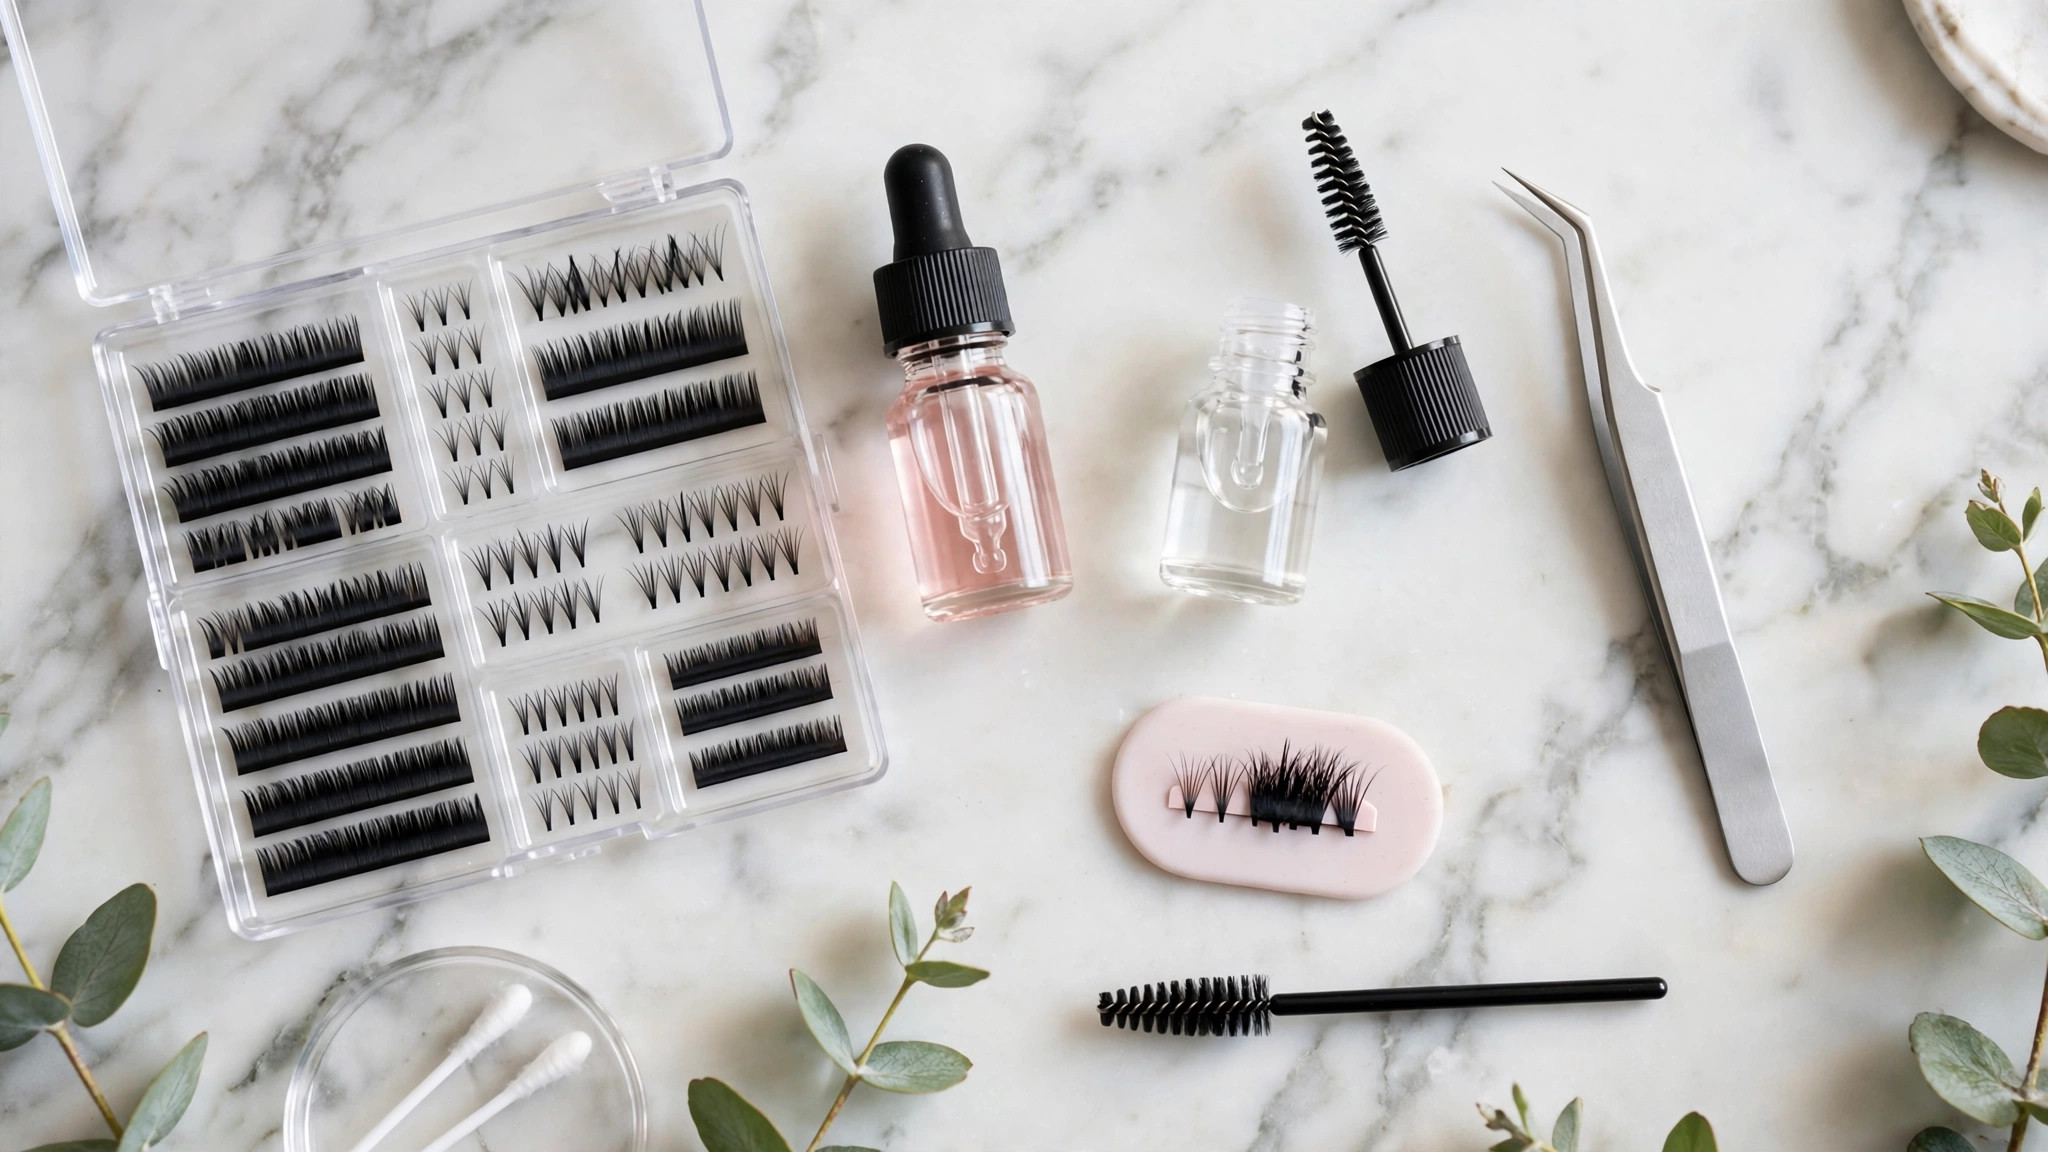
- Lash clusters in mixed lengths: look for a starter set with 10mm, 12mm, and 14mm options. Wispy or natural styles are most forgiving for beginners.
- Lash bond (adhesive): choose a formula designed specifically for clusters — regular strip-lash glue is not the same thing.
- Lash sealant: applied after the clusters to lock them in, remove stickiness, and extend wear.
- Angled or straight lash tweezers: precision tweezers make picking up and placing clusters dramatically easier than fingers.
- A small mirror: a handheld or magnifying mirror lets you see the lash line clearly while looking slightly downward.
- Oil-free makeup remover or dedicated lash remover: keep this on hand before you even apply your first set.
When choosing products, read reviews that mention comfort and wear time rather than just the final look, and check that the bond you buy is latex-free if you have a latex sensitivity.
How Do You Patch Test and Protect Your Eyes?
Patch test the bond for a full day before a full set, never share lash products or apply clusters over contact lenses, keep bond away from the waterline, and remove lashes promptly if eyes become painful or swollen.
- Apply a tiny dot of bond behind your ear or on the inside of your forearm, and a minuscule amount along the outer corner of one eye’s lash line.
- Wait a full 24 hours. If you develop redness, itching, swelling or any irritation, do not proceed — that formula is not for you.
- Never share lash products with anyone else — eye infections spread easily this way.
- Never apply clusters while wearing contact lenses; put your lenses in after application, or wear glasses that day.
- Keep the bond away from the waterline and the inner corner too close to the tear duct.
- If eyes become painful, very red or swollen, remove the lashes promptly and give your eyes a break; if symptoms persist, see an eye-care professional.
Allergic eye reactions commonly cause red, itchy and watery eyes, and contact lenses should not be worn until symptoms have settled (Moorfields Eye Hospital NHS). If your natural lashes are currently sparse or damaged, give them time to recover before adding clusters.
How Do You Apply Lash Clusters Step by Step?
Apply clusters in eight steps: start clean and dry, plan your lash map, coat roots thinly with bond, place clusters underneath about a millimetre from the skin working inward, fuse gently, and seal the base.
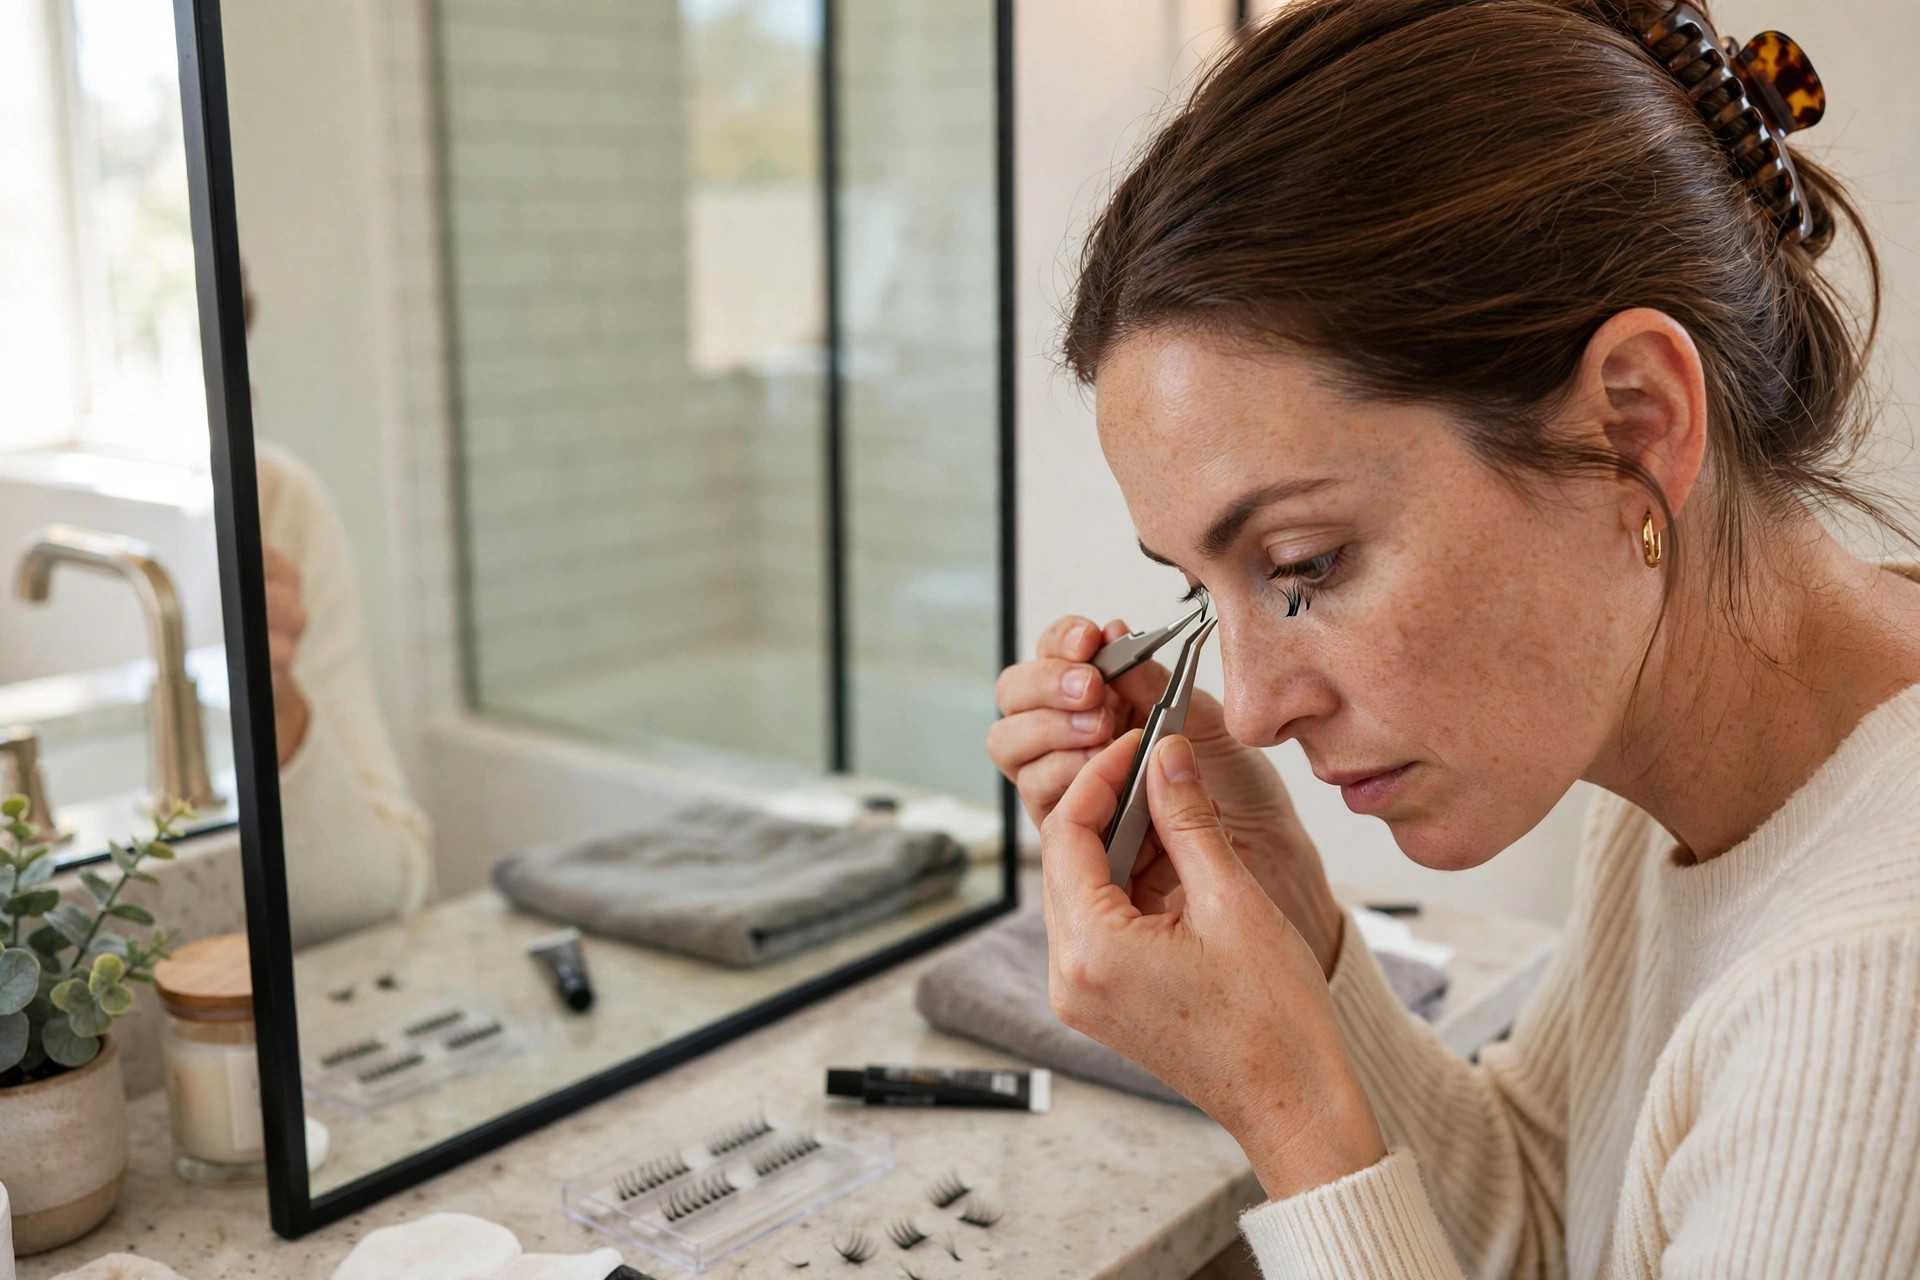
- Start with clean, dry lashes. Remove all eye makeup and ensure lashes are free of mascara, oils and moisturiser — oily residue is the main reason clusters fail to stick.
- Plan your lash map. A natural everyday map: 10mm at the inner corner, 12mm through the middle, 12mm or 14mm at the outer corner. A cat-eye map: shortest inside, longest outside.
- Apply a thin coat of bond. Brush a light layer onto the underside of your natural lashes, focusing on the base near the lash line. Wait 20 to 30 seconds until it turns tacky.
- Pick up your first cluster. Grip a cluster near its base with tweezers. Start at the outer corner with your longest planned length.
- Place underneath, 1mm from the skin. Looking down into your mirror, tuck the cluster against the underside of your natural lashes, about a millimetre away from the lash line skin. Do not place clusters directly on skin or on the waterline.
- Work inward. Continue placing clusters side by side toward the inner corner, decreasing length as you go. Slight overlaps help the set look seamless.
- Fuse gently. Use tweezers to gently press your natural lashes and the clusters together along the base.
- Seal the deal. Apply a thin coat of sealant along the base of the lashes, top and bottom, to remove tackiness and extend wear.
Give yourself 20 to 30 unhurried minutes the first time, work on one eye completely before starting the other, and avoid getting the lashes wet for the first few hours while the bond fully cures. Check both eyes together in a normal mirror — small differences are normal and invisible to everyone but you.
How Do You Style Clusters for Your Eye Shape?
Choose your lash map by eye shape: cat-eye lengthens round eyes, centre length opens almond and monolid eyes, stronger curls suit hooded eyes, and outer-corner emphasis lifts downturned eyes beautifully.
- Round eyes: a cat-eye arrangement — shortest at the inner corner graduating to longest at the outer — adds elegant elongation.
- Almond eyes: an even, natural map with slightly extra length in the centre opens the eyes beautifully.
- Hooded eyes: stronger curls (C or D curl) and slightly longer lengths, so lash tips peek out from under the lid fold.
- Monolid eyes: a centre-focused doll map creates the illusion of rounder, more open eyes.
- Downturned eyes: outer-corner emphasis lifts beautifully.
- Wide-set eyes: extra fullness toward the inner corners looks more balanced.
- Density: wispy clusters look soft and natural for daytime; denser clusters give glamorous, makeup-ready fullness for evenings.
How Do You Make Your Clusters Last for Days?
Clusters last best when you avoid steam and heat for the first day, keep oil-based products away from the eyes, cleanse with gentle patting, sleep on your back where possible, and skip waterproof mascara over the set.
- For the first 24 hours, avoid steam, saunas and very hot showers directly on the face.
- Keep oil-based products away from the eye area — oil dissolves lash adhesive — and switch to oil-free cleansers around the eyes.
- Cleanse with gentle patting motions rather than rubbing, using a soft brush or cotton bud along the lash line.
- Sleep on your back where possible, or at least avoid pressing your face directly into the pillow; a silk or satin pillowcase reduces friction.
- Avoid waterproof mascara over clusters; a regular mascara applied very lightly just at the base is fine if you want extra definition.
How Do You Remove Clusters Without Damaging Natural Lashes?
Never pull clusters off dry: hold an oil-based or dedicated remover against the lash line for thirty to sixty seconds, slide clusters gently away, cleanse thoroughly, and rest natural lashes between sets.
- Saturate a cotton pad or bud with your oil-based remover or dedicated lash remover and hold it gently against the lash line for 30 to 60 seconds.
- With a gentle downward sliding motion, ease the clusters away. If a cluster is stubborn, reapply remover and wait longer rather than forcing it.
- After all clusters are off, cleanse the eye area thoroughly to remove every trace of bond and remover.
- Apply a nourishing eye cream or a drop of castor or jojoba oil along the lash line, and give natural lashes a rest day or two between sets.
If your natural lashes look sparse or brittle after repeated wear, extend the breaks between sets or switch to wearing clusters only for special occasions. Healthy natural lashes are the foundation everything else builds on.
Leave a Reply