
Last updated: October 2026
Quick answer: Painted pumpkins are the no-carve alternative to carved jack-o’-lanterns. Wipe the pumpkin clean, prime it with white acrylic so colours pop, paint your design with craft acrylics or paint pens, then seal it for outdoor use. Painted pumpkins last for weeks, suit every age and need no sharp tools.
Carving pumpkins is a beloved autumn tradition — but between the sharp knives, the stringy mess and the pumpkins that collapse into mush within days, it is not always the most relaxing craft. Enter the painted pumpkin: all of the charm, none of the carving, and a finished decoration that can last for weeks.
Fun fact before we start: botanically, a pumpkin is a fruit — a type of berry called a pepo, according to Encyclopaedia Britannica. And the jack-o’-lantern tradition itself began with carved turnips in Irish folklore, long before pumpkins took over — a history Encyclopaedia Britannica traces in its jack-o’-lantern article.
No-carve pumpkins are perfect for families with little ones, for renters who do not want pumpkin guts on the carpet, and for anyone who loves a more polished, decorative look. A painted pumpkin can be spooky, sweet, elegant or hilarious — and the designs below prove it. Grab some paint and let us get creative.
What paint and supplies do you need for pumpkin painting?
Acrylic craft paint is the best choice — it is inexpensive, dries quickly and sticks well to pumpkin skin. Add a flat brush for base coats, detail brushes, acrylic paint pens for fiddly bits, a primer for pale designs, a clear sealer for outdoor pumpkins and embellishments like stencils or glitter.

Before you start painting, a little preparation makes all the difference between a design that looks charming and one that looks, well, like a toddler did it (which is also charming, to be fair). Here is your essential kit:
- Acrylic craft paint: the best choice for pumpkins. It is inexpensive, comes in every colour imaginable, dries quickly and sticks well to pumpkin skin. Look for multi-surface or outdoor formulas if your pumpkins will live outside.
- Brushes: a flat 1-inch brush for base coats, medium round brushes for details, and a fine liner brush for outlines and faces. Foam brushes are brilliant for smooth, streak-free base coats.
- Paint pens: acrylic paint markers are a game-changer for details, lettering and outlining. Much easier to control than a brush for fiddly bits.
- Primer: a coat of white acrylic paint or spray primer first makes colours pop, especially on deep orange pumpkins. Essential for pastel designs.
- Sealer: a clear acrylic sealer spray (matte or gloss) protects your design from rain and handling. Two light coats are better than one heavy one.
- Extras: stencils, painter’s tape for crisp lines, sponges for texture, glitter, googly eyes, felt, ribbon and a hot glue gun for 3D embellishments.
Prepping your pumpkin: Wipe the pumpkin clean with a damp cloth and let it dry completely. If you are painting a design that needs a light background, apply one or two coats of white or cream paint as a base and let each coat dry fully — rushing this step is the number one cause of streaky results. Work in a well-ventilated space, protect your table with newspaper, and keep a damp cloth handy for mistakes (acrylic paint wipes off easily while wet).
Real pumpkins give the most authentic look, but craft pumpkins from a hobby shop are a brilliant alternative: they are lightweight, perfectly shaped, reusable year after year, and they never rot. For intricate designs, many crafters actually prefer them.
What are the cutest no-carve pumpkin painting ideas?
From polka dots and spooky-cute ghosts to galaxy pumpkins, candy corn stripes and Day of the Dead sugar skulls, the list below runs from easiest to most ambitious. Every design is no-carve and beginner-friendly — and you can mix and match elements to invent your own.
Here is a bumper list of designs, roughly ordered from easiest to most ambitious. Every one is no-carve and beginner-friendly with a little patience. Use this table to pick your starting point:
| Difficulty | Try these | Good for |
|---|---|---|
| Easiest — paint and go | Polka dots, ghost faces, candy corn stripes, confetti, mummy wrap | Children, first-timers, craft nights |
| Easy with a little care | Pastel rainbow stripes, donut pumpkin, monogram initial, plaid, spiderweb, honeybee | Teens, cosy farmhouse looks |
| Takes patience | Floral meadow, black cat silhouette, ombre fade, metallic glam, moon phases, sunflower | Decorative doorstep displays |
| Most ambitious | Galaxy pumpkin, woodland creatures, chalkboard pumpkin, sugar skull, storybook scene | A weekend project, older children |
- Classic polka dots: Paint the pumpkin white or pastel, then dot all over with a contrasting colour using the end of a paintbrush. Simple, cheerful, foolproof.
- Spooky-cute ghost faces: A white pumpkin with simple black oval eyes and an open “o” mouth is instantly adorable. Add rosy cheeks for extra cuteness.
- Pastel rainbow stripes: Painter’s tape + soft pastel stripes = a dreamy, modern pumpkin that looks gorgeous on a doorstep.
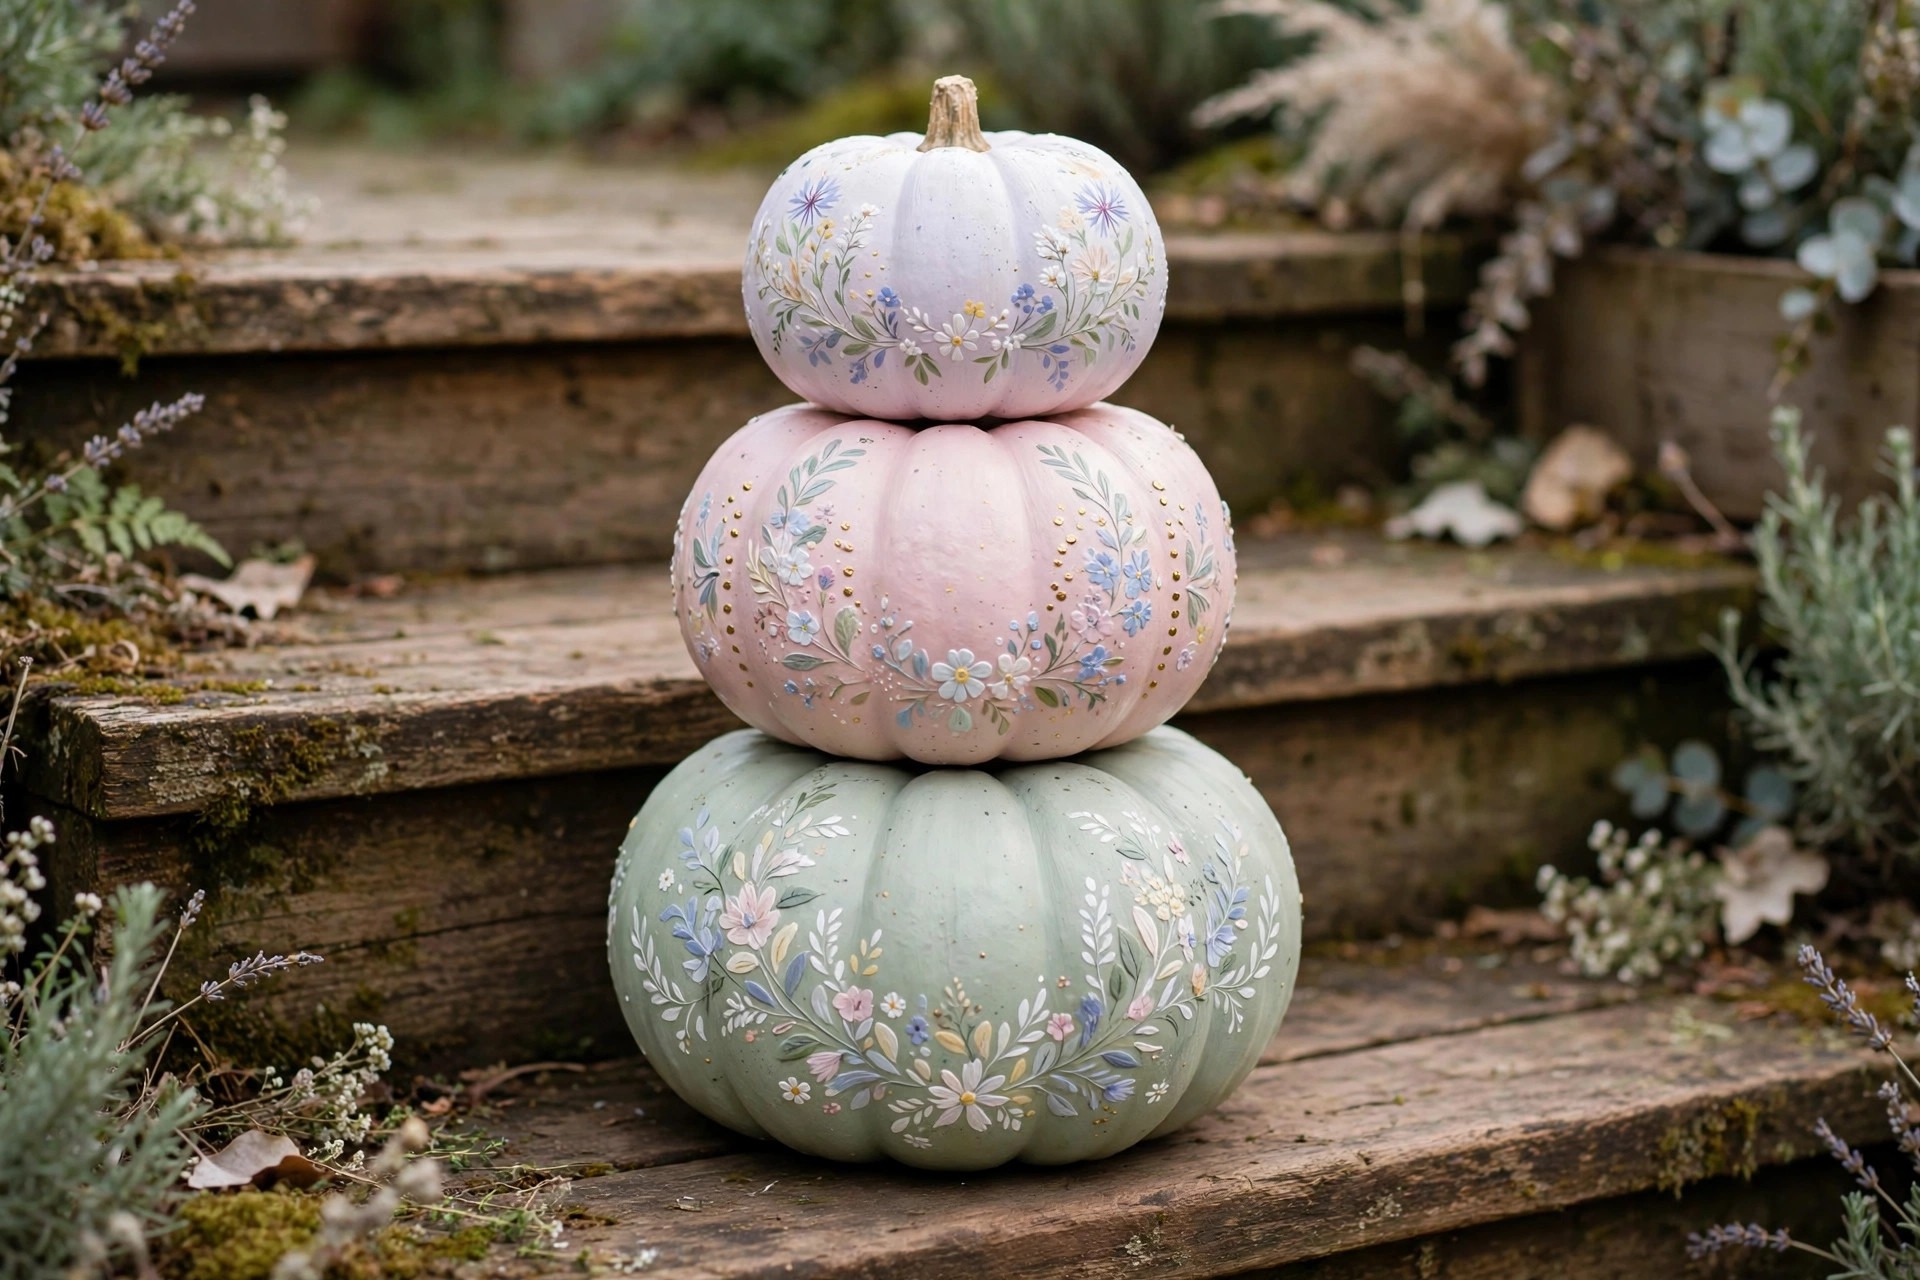
- Floral meadow: Paint tiny daisies, leaves and vines wandering up the pumpkin. White pumpkins show florals off best.
- Black cat silhouette: A solid black pumpkin with a painted cat silhouette (or a real painted cat face) is Halloween-perfect.
- Candy corn stripes: Paint horizontal bands of white, orange and yellow for a giant candy corn. Impossibly cute in a group of three.
- Donut pumpkin: Pink “frosting” dripping down from the top with colourful sprinkles painted on. A guaranteed smile-maker.
- Galaxy pumpkin: Deep navy or black base with sponged purples, pinks and white star dots. Surprisingly easy with a sponge.
- Mummy wrap: White paint with thin black lines wrapped around like bandages, plus googly eyes peeking out. Kids adore this one.
- Monogram initial: Paint the pumpkin a rich solid colour (navy, emerald, burgundy) and add your family initial in gold paint pen. Elegant and personal.
- Sunflower pumpkin: Yellow petals radiating from the stem with a brown centre — paint it directly on an orange pumpkin for a warm, harvest feel.
- Spiderweb: White or silver web lines on a black pumpkin, with a little painted spider hanging down. Spooky but sweet.
- Ombre fade: Blend from deep orange at the bottom to cream at the top (or any colour pairing). Use a dry sponge to blend while wet.
- Woodland creatures: Paint a fox face, owl or hedgehog on the front. Round pumpkins are perfect for animal faces.
- Chalkboard pumpkin: Chalkboard paint + chalk markers means you can change the message daily — countdowns, greetings, doodles.
- Metallic glam: Gold, copper or rose-gold metallic paint all over, with maybe a black stem. Stunning with fairy lights.
- Day of the Dead sugar skull: White base with colourful floral patterns around painted eyes. Beautiful and meaningful.
- Storybook pumpkin: Paint a scene from a favourite book — a house, trees, a moon. A lovely project for older children.
- Plaid or gingham: Criss-crossing lines in autumn colours for a cosy, farmhouse look. Painter’s tape keeps lines crisp.
- Confetti celebration: White pumpkin covered in tiny colourful dashes and dots. Festive and modern.
- Honeybee pumpkin: Yellow with black stripes and little painted bees buzzing around. Sweet as honey.
- Moon phases: A dark pumpkin with the phases of the moon painted in gold around the middle. Dreamy and sophisticated.
Do not feel you must copy these exactly — mix and match elements. A ghost face with floral cheeks, a galaxy pumpkin with a gold monogram, a bee pumpkin with polka-dot wings: the best designs come from playing.
How do you get neat, long-lasting painted pumpkin designs?
Professional-looking results come from technique, not talent: thin coats instead of one gloopy one, full drying time between layers, a light pencil sketch first, painting top to bottom, and a clear sealer to protect the design. Wet acrylic wipes off easily, so fix mistakes fearlessly.
A few professional tricks will take your painted pumpkins from homemade to handmade-with-love:
- Thin coats beat thick ones. Two or three thin coats of paint dry smoother and chip less than one gloopy coat. Patience pays.
- Let layers dry fully. At least 20 to 30 minutes between coats. Use a hairdryer on cool to speed things up if you are impatient.
- Sketch first. Lightly draw your design with a pencil before painting — it erases easily and saves heartbreak.
- Work top to bottom. Paint the top of the design first so you do not drag your sleeve through wet paint below.
- Seal your work. A clear acrylic sealer protects against moisture, fading and curious fingers. Reapply if pumpkins live outdoors in rain.
- Store smart. Real painted pumpkins last 2 to 4 weeks in cool, dry conditions. Bring them in during heavy rain and frost to extend their life.
- Fix mistakes fearlessly. Wet acrylic wipes off with a damp cloth; dry mistakes can be painted over with your base colour. There are no ruined pumpkins, only happy accidents.
How should you display painted pumpkins?
Group pumpkins in odd numbers at varying heights, mixing painted pumpkins with natural gourds, fairy lights and autumn leaves. Put detailed designs near the door where visitors see them up close, and bold, simple patterns further out where they read well from the street.
Once your masterpieces are dry, show them off properly. Group pumpkins in odd numbers (threes and fives look best) at varying heights — use crates, steps or hay bales as risers. Mix painted pumpkins with natural ones, gourds, fairy lights and autumn leaves for a rich, layered display.
- On the front porch: cluster your cutest designs near the door where visitors see them up close, and place bolder, simpler designs (stripes, metallics, monograms) further out where they read well from the street. Battery-operated fairy lights woven through the display make painted pumpkins glow magically after dark — far safer than candles and kinder to your paintwork.
- Indoors: a single beautiful painted pumpkin on a mantelpiece, styled with dried flowers and a candle, makes a stunning autumn centrepiece. Smaller painted pumpkins work wonderfully as table settings — write each guest’s name on one with a paint pen for the most charming place cards imaginable.
How do you paint pumpkins with kids without the stress?
The secret is embracing the process over the result: old clothes, a wipeable tablecloth, washable paints and just three or four colours per child. Paint base coats first, take a snack break while they dry, and give children’s pumpkins pride of place on the front step.
Painting pumpkins with children is one of the great joys of autumn — provided you set yourself up for success rather than stress. The key is embracing the process over the result: your five-year-old’s lopsided ghost is perfect exactly as it is.
Choose the right setup. Dress children in old clothes or aprons, cover the table with a wipeable cloth, and use washable acrylic or poster paints for under-sevens. Give each child their own water pot, a small palette (a paper plate works brilliantly) and just three or four colours — too many choices overwhelm little ones. Keep baby wipes within arm’s reach for speedy clean-ups.
Pick age-appropriate designs.
- Toddlers and preschoolers: simple stamping — dip apple halves, leaves or their own hands in paint and press onto the pumpkin.
- Primary-age children: ghost faces, polka dots and mummy wrap from the list above, especially with googly eyes to stick on.
- Older children and teens: galaxy, floral and monogram designs — and they often surprise you with their creativity.
Manage the drying time. Children’s patience and wet paint are natural enemies. Paint in stages: base coats first, then a snack break while they dry, then details. A hairdryer on the cool setting speeds things along and feels like part of the fun. Remind young painters to hold the pumpkin by the stem to avoid smudging their masterpiece.
Display their work proudly. Give children’s pumpkins pride of place — on the front step, by the door, or on a low table where little artists can admire them. Take photos before the designs inevitably get rained on. Many families make pumpkin painting an annual tradition, keeping one photo each year to watch little skills grow. Years from now, you will treasure those wobbly painted faces far more than any perfect one.
Painted pumpkins are proof that the simplest crafts are often the most delightful. No sharp tools, no slimy seeds, no race against rot — just paint, imagination and a pumpkin. This autumn, skip the carving kit and pick up a paintbrush instead. Your doorstep (and your kitchen table) will thank you.
Leave a Reply