
Halloween nails have a reputation problem. Mention them and most people picture neon-green slime, plastic-looking blood, and designs you would never wear past October 31st. But Halloween nail art in 2026 looks nothing like that. Searches are up 100% right now, and the designs topping Pinterest are chic, subtle, and genuinely wearable — the kind of nails that feel festive at a Halloween party and still look good at work on November 1st.
This guide rounds up 21 Halloween nail designs worth trying, grouped by vibe so you can find yours fast. Then it covers how to DIY them at home (even with zero nail-art skills), when to book a salon instead, and how to make your manicure survive all the way through Halloween night.
The Ground Rules for Tasteful Halloween Nails
Before the ideas, three rules that separate chic Halloween nails from costume-shop nails:
- Limit your palette. Pick two colors, three at most. Black + nude, burgundy + gold, orange + cream — restraint is what makes spooky look sophisticated.
- Use accent nails. You do not need all ten nails screaming Halloween. Two accent nails with art and eight in a coordinating solid color looks intentional and polished.
- Keep the shape clean. Almond or short square shapes keep even the spookiest art looking elegant. Very long stilettos plus Halloween art tips into costume territory fast.
Classic and Chic (5 Designs)
For anyone who wants a nod to Halloween without going full spooky.
- Black French tips. A nude base with black tips instead of white. Simple, striking, and it works with everything you own.
- Burgundy ombré. Deep wine fading to black at the tips. It reads as a rich fall manicure with just a whisper of Halloween — and it pairs beautifully with a berry-toned fall makeup look.
- Gold spiderweb accent. Nude nails with one accent nail featuring a delicate gold spiderweb. Jewelry-like and surprisingly elegant.
- Matte black, short. No art at all — just perfectly applied matte black on short, neat nails. Sometimes the boldest Halloween statement is simplicity.
- Tortoiseshell. The mottled amber-and-brown pattern looks like fall leaves frozen on your nails. Festive without a single pumpkin in sight.
Cute and Playful (5 Designs)
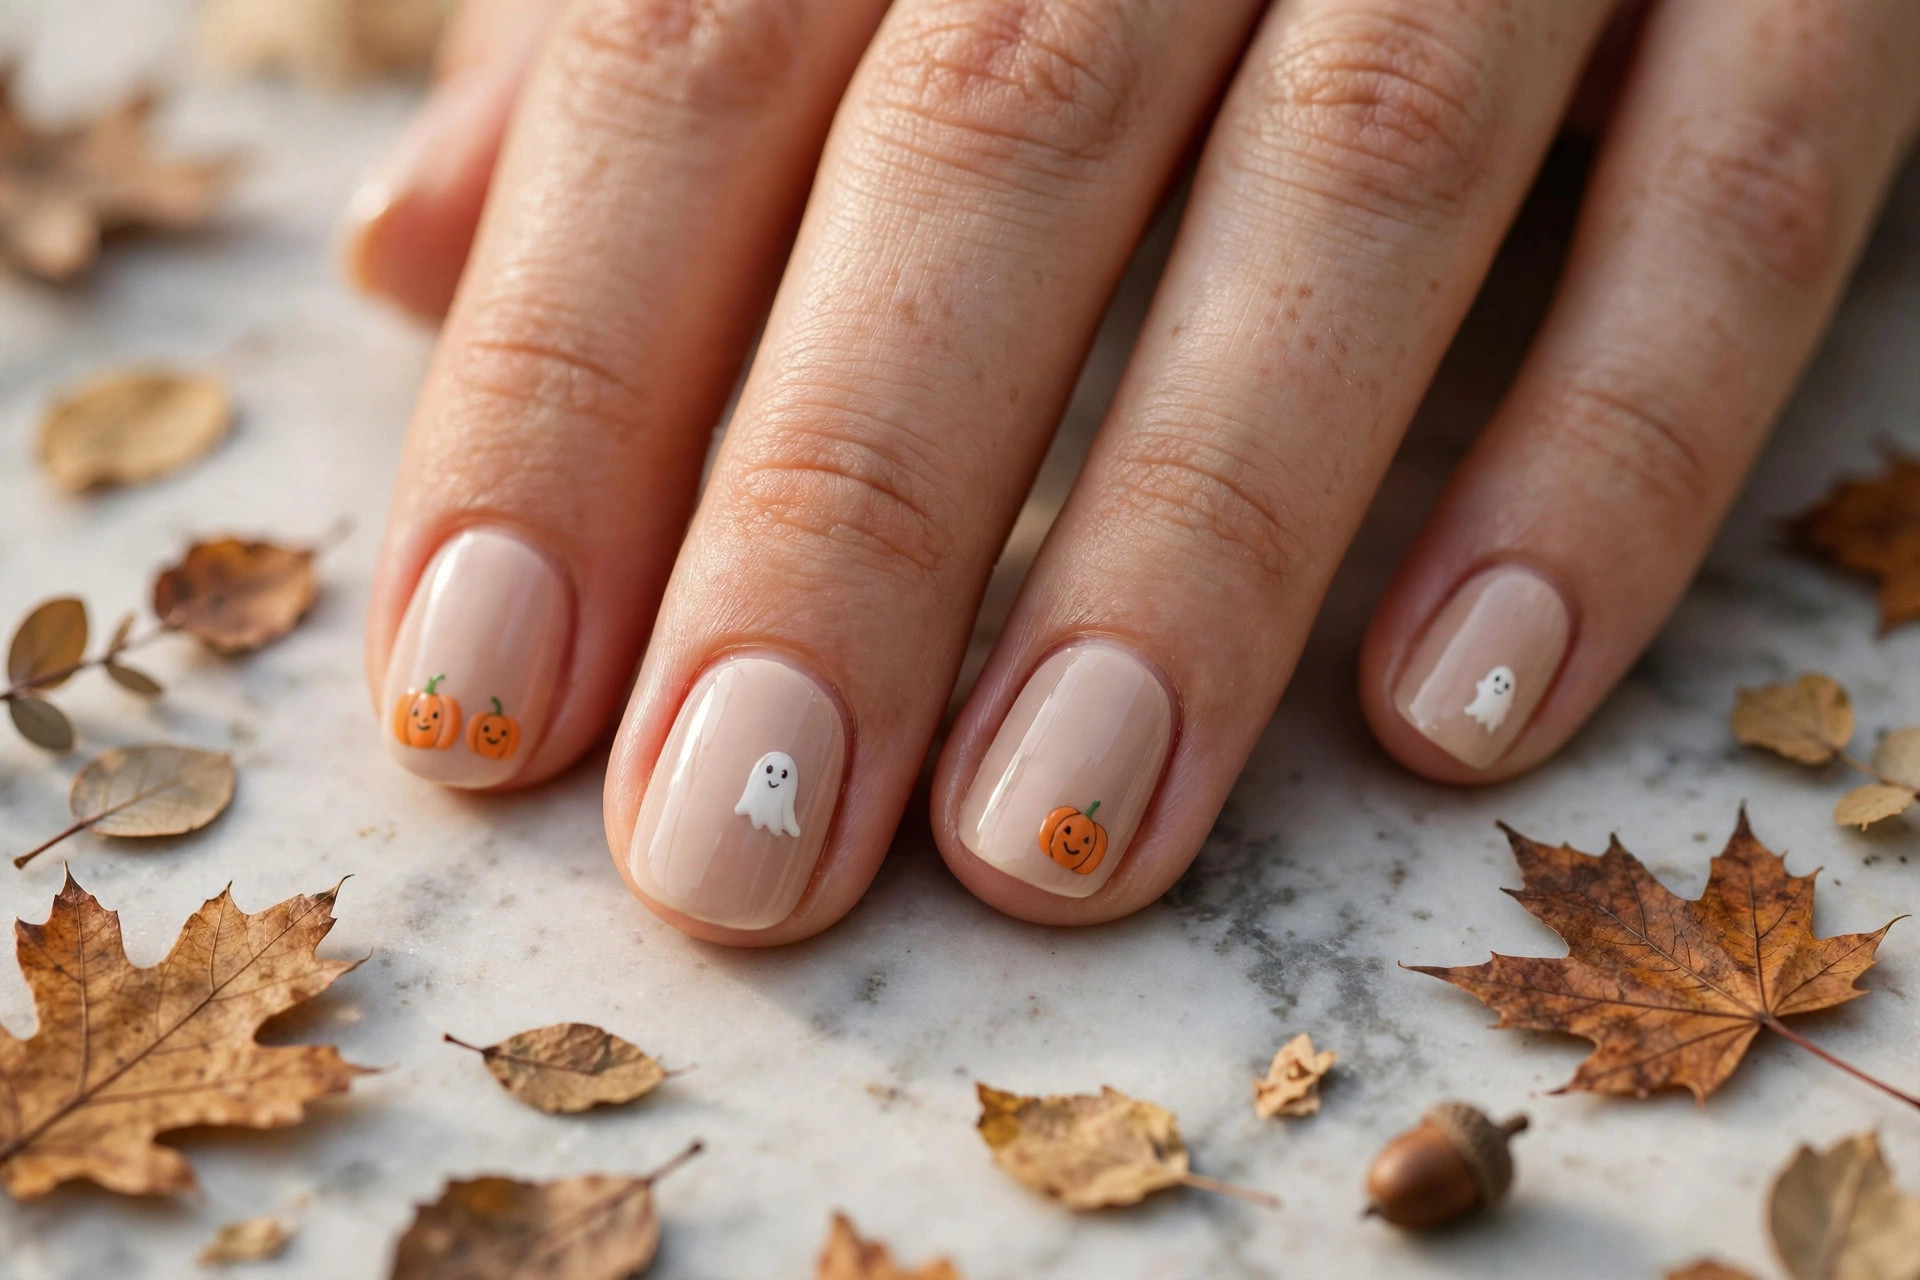
For the Halloween lovers who want the fun stuff — done tastefully.
- Minimal ghosts. Tiny white ghost silhouettes on a nude base, one per accent nail. Adorable, and far chicer than a full ghost scene.
- Candy corn tips. French tips painted in candy corn stripes (white, orange, yellow). Nostalgic and cheerful.
- Tiny pumpkins. One small hand-painted pumpkin per nail on a cream base. Keep them small and simple — think icon, not illustration.
- Friendly bats. Small black bat silhouettes flying across a dusky purple-gray base. Cute-spooky, not scary-spooky.
- Eyeball accent. A single cartoon eyeball on each ring finger. It gets laughs every time and takes minutes with a dotting tool.
Dark and Moody (6 Designs)
For October’s main characters — dramatic, but still wearable.
- Blood-red drips. Deep red “drips” over a nude or black base. Done with a thin brush, it looks like high fashion, not a horror movie.
- Black cat eye. Magnetic cat-eye polish in deep plum or black creates a shifting, smoky effect that feels mysterious and expensive.
- Witchy moons and stars. Tiny gold moons and stars scattered over near-black polish. Celestial, moody, and beautiful well past Halloween.
- Smoky marble. Black and gray marble with a glossy top coat looks like storm clouds. Add one gold accent nail to keep it from feeling flat.
- Dark cherry. Almost-black cherry red, glossy, short. The vampire-adjacent manicure that works for the entire fall season.
- Spiderweb French. Black base with white spiderweb art stretched across two accent nails. The contrast is dramatic and graphic in the best way.
Minimalist Halloween (5 Designs)
Proof that you can do Halloween with almost nothing.
- One black nail. Nine nude nails, one black. That is the whole design, and it absolutely works.
- Orange dot. A single tiny burnt-orange dot near the cuticle of each nail on a sheer base. From across the room it is just a pretty manicure; up close, it is Halloween.
- Half-moon in black. The classic half-moon manicure with the moon painted black instead of left bare. Subtle and cool.
- Thin black line. A single fine black stripe down the center of each nude nail. Modern, graphic, faintly spooky.
- Nude with black micro-French. The thinnest possible black tip — a whisper of Halloween for the most minimalist among us.
How to DIY Halloween Nails at Home
You do not need professional skills for most of these designs. You need the right shortcuts:
- A dotting tool makes dots, eyes, pumpkin shapes, and moon craters. It is the single most useful nail-art tool for beginners.
- A thin striping brush handles spiderwebs, drips, and fine lines. Load it lightly — less polish gives you more control.
- Nail stickers and decals are the cheat code. Ghost, bat, and pumpkin decals applied over a solid base look hand-painted from any normal viewing distance. Seal with top coat.
- Work in thin layers and let each layer dry fully. Thick, wet layers are why DIY nail art smudges.
- Clean up with a small brush dipped in acetone around the cuticles. This one step makes home manicures look twice as professional — it is a core trick in our at-home manicure guide too.
Salon or DIY? How to Decide

DIY is perfect for: solid colors with simple accents, stickers and decals, dotting-tool designs, and anything on the minimalist list. You will save $50+ and most of these take under an hour.
Book the salon for: detailed hand-painted scenes, ombré and marble effects (hard to blend smoothly at home), magnetic cat-eye polish (needs the right magnet technique), or any design you want to last 2+ weeks. Bring reference photos — Halloween art is one area where “show, don’t tell” really matters, because the same description produces wildly different results in different hands.
Make Them Last Through Halloween (and Remove Glitter Right)
Timing: if you want your nails perfect for Halloween weekend, do them 2–3 days before, not the morning of — fresh art chips fastest in the first 24 hours. Seal everything with two thin top coats, reapply top coat every 2–3 days, and wear gloves for dishes.
And a warning about glitter: Halloween loves glitter polish, and glitter is famously miserable to remove. Do not scrub — soak cotton in acetone, wrap each nail in foil for 10 minutes, and the glitter slides off. Your nail beds will thank you.
Matching Your Manicure to Your Halloween Plans
The “right” Halloween nails depend on what your October actually looks like:
- Office Halloween party: go chic and subtle — black French tips, tortoiseshell, or the single black nail. Festive enough for the party, professional enough for the Monday meeting.
- Full costume night: match your nails to the costume. Witch costume? Moons and stars. Vampire? Dark cherry. Skeleton? Black and white minimal. Coordinated details are what make a costume look great instead of thrown-together.
- Handing out candy / family night: cute and playful wins — tiny ghosts, pumpkins, or candy corn tips. Kids notice nails more than you would think, and they love them.
- No plans at all: honestly, this is the best reason to do Halloween nails. A burgundy ombré or matte black manicure is just a great fall manicure that happens to feel seasonal.
After Halloween: Easing Back to Everyday Nails
November 1st arrives and suddenly the spiderwebs feel like a lot. You have options beyond starting over:
- Keep the base, lose the art. If your design was accent nails over a nude or burgundy base, simply repaint the two accent nails to match. Instant everyday manicure, zero waste.
- Dark shades transition beautifully. Oxblood, espresso, and black are all perfectly normal November colors. Just remove any obvious Halloween motifs and keep wearing the base.
- Glitter is the exception. Halloween glitter in November reads as leftover costume. Soak it off with the foil method and start fresh — your nails will appreciate the clean slate.
Planning your manicure with the “after” in mind is the mark of someone who has done this before. Future you, sitting at your desk on November 3rd, will be grateful.
Halloween Nails on Any Budget
You can do this trend at every price point. The cheapest route — a bottle of black polish and a dotting tool you already own — costs under $10 and covers most of the minimalist designs. A mid-range approach with stickers, a striping brush, and two or three seasonal shades runs about $20–$30. A salon set with hand-painted art typically costs $60–$100 depending on detail. All three can look fantastic; the difference is time versus money, not quality. Pick the one that fits your October.
The Bottom Line
The best Halloween nail design is the one you will still like on November 2nd. Whether you go for a single black accent nail or a full set of tiny ghosts, keep the palette tight, keep an accent-nail strategy, and do not overthink it. Save your favorites to your Halloween board, grab a dotting tool, and have fun with it — spooky season only comes once a year.
Leave a Reply